Monday, December 2, 2013

Laser cut Delrin tsuba

I never bothered to ask the internet whether you could cut Delrin (polyacetal plastic) with a laser cutter.  That is, until last night and the answer was YES, just be careful of the fumes.  I've been wanting to make a better looking tsuba (guard) for my bokken (wooden practice sword, in this case for Iaido).  Here are the results of my first test, I think there's an interesting future in making custom tsuba.

(a lovely customized tsuba)

(doesn't it look nice on my bokken)
(all I need is a darker stopper)

(original tsuba for comparison. Ugly, no?)


Sunday, December 1, 2013

Progress on s#!t

Made a little progress on various projects.


Wired up some RGB LEDs for the Alpha sculpture, it's going to need more lights on the damn thing (quite a few more lights).

In other news I cut and planed a variety of different types of wood (fir, cedar, myrtle and purple heart) to glue up on the bokken form (see previous post).  The softer woods I'll be using first for practice so as not to screw up my limited stock of exotic wood.  I'm starting from this instructable I found a while back, modifying it by using 3 strips of wood instead of 2 and a 5/8" round over routing bit (for the blade edge).  Here is some fir on the form:

   
Still working on the router jig design, almost there.  Then I'll be cranking out bokuto, sorta.

Sunday, November 24, 2013

$#!t I've been working on

It's been a while since I last posted, aside from parenting I've been chipping away at stuff.  These parts are for a scale model of a sculpture that will pay off the laser cutter.


Thankfully, most of this piece is going to end up frosted (in this case roughed up with fine grit sand paper) since the bubbles in the glue job look annoyingly ugly.  The interior will be lit with RGB LEDs and controlled by some manner of Atmel chip.

I continue to attempt to create a block lifter that's properly aligned.  This is my first attempt at 3D printed parts, my thanks to fellow EnjiGo member Duane.  Much to my dismay I set the tolerances too tightly and the parts required a lot of filing and boring before I could install the hardware (which led to a misaligned linear bearing).


Last but not least, behold a laser cut glue-form for making bokken (wooden practice long sword).  I recently started practicing Iaido (which is awesome) and have become interested in creating my own special brand of bokken.


Saturday, September 21, 2013

The many novel uses of a laser cutter...

In a mad rush to scrape together a gift for +Shane Wallace and his impending birthday (this all occurred a few weeks ago).  I decided to dig some images out of our collective past and turn them into wood engravings.  We're both Dungeons & Dragons fans so I selected some of my favorite illustrations from the Fiend Folio and throw them into a composition.  Here's the result (note, this was a test run on a smaller pieces of wood):  


(please note this work IS copyrighted, however both myself and the recipient of this gift own physical copies of book containing these images.  Also, no money has changed hands so an argument for fair use is pretty strong regarding this new composition. The original art work was all created by Russ Nicholson.)


It worked out well enough that I might try to make a few more (with public domain images) and see if they'll sell.  If anyone has a specific piece that won't violate copyright I'd be interested in talking about commissions.

Thursday, September 19, 2013

Still kicking...

I know that my adoring fan base is wondering, "what the hell's happened to Ian's blog?" (snort, like anyone other than bots and scrapers read this thing).  I've been meaning to add some posts but I've been so damn busy I haven't had the time to put together anything coherent.  So, here's an attempt at coherence and a summary of my recent tinkering and design activity.

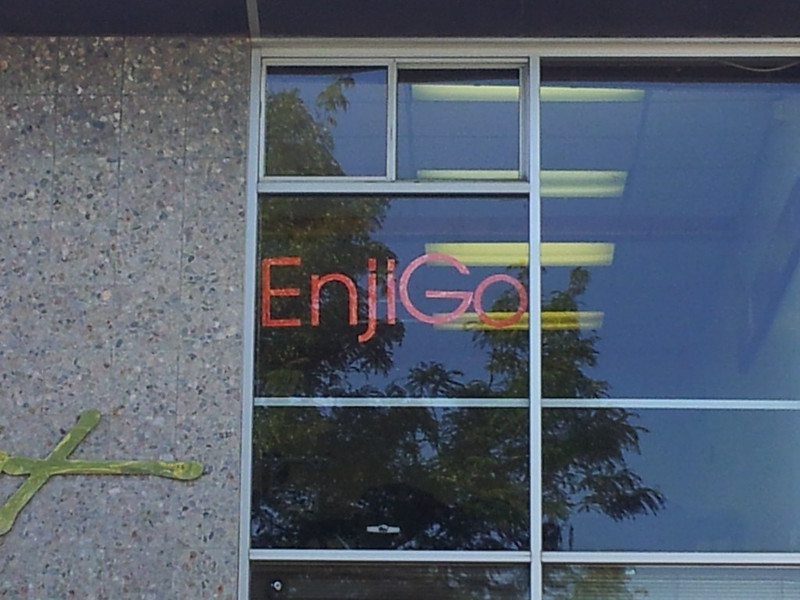
A month or two ago I joined a maker space named EnjiGo.  It's a relatively new organization (a merger between MakeSLC and a robot building club), and there are quite a few things that need to be done for the organization.  When I joined there was no logo, no brand and no real identity, which equates to a very slow word-of-mouth growth strategy (though with member attrition it seems like we're lucky to keep a constant number of members).  For those not familiar with maker spaces, these are collective spaces with room to work, shop and rapid prototyping tools and a group of members who have expertise in a variety of different fields (often some brand of engineering).  In EnjiGo's case there's also a mandate to educate the community and share skill sets.  As a paying member I'm allowed to vote on the behavior of the organization and since groups such as this can tend towards apathy we have termed ourselves a Do-ocracy (entitlement through action).  Anyway (back on track to some self aggrandizement), I took it upon myself to design a logo and build a window sign to replace the makeshift, barely legible masking tape on window spelling E N J I G O. Here's the new logo:
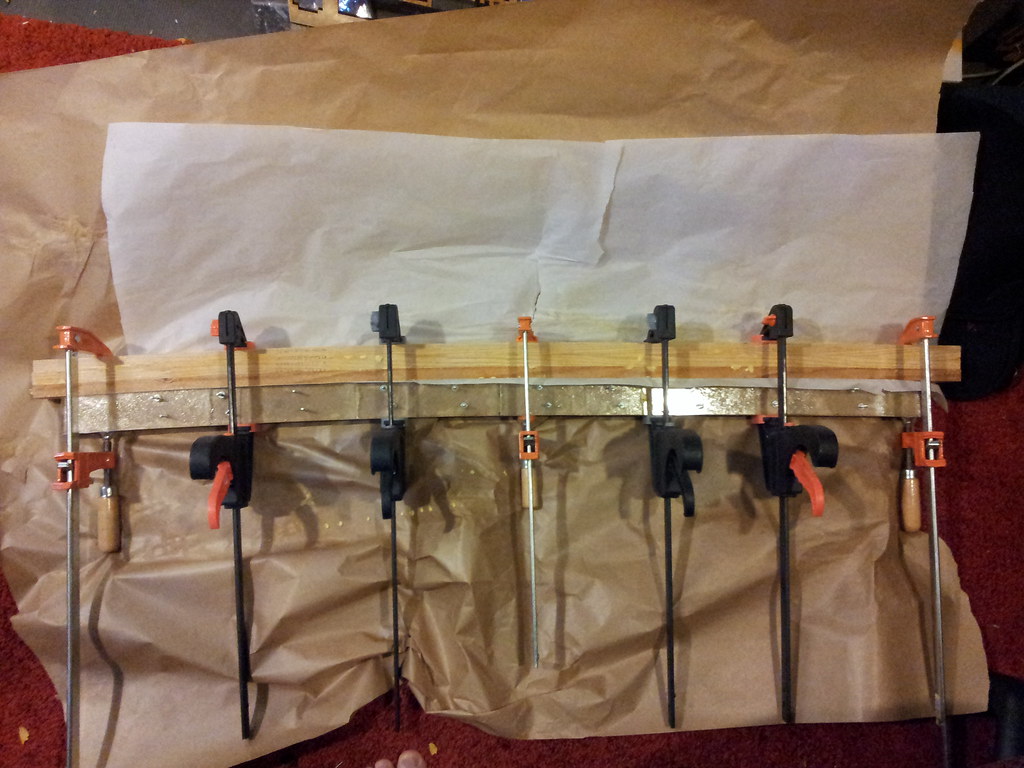
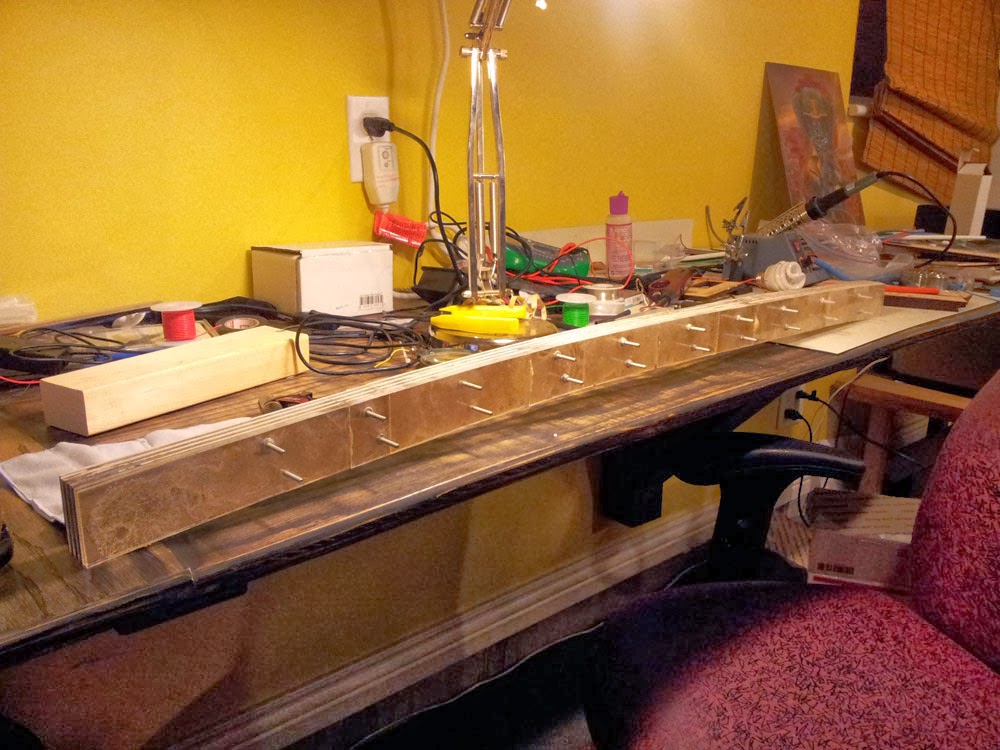
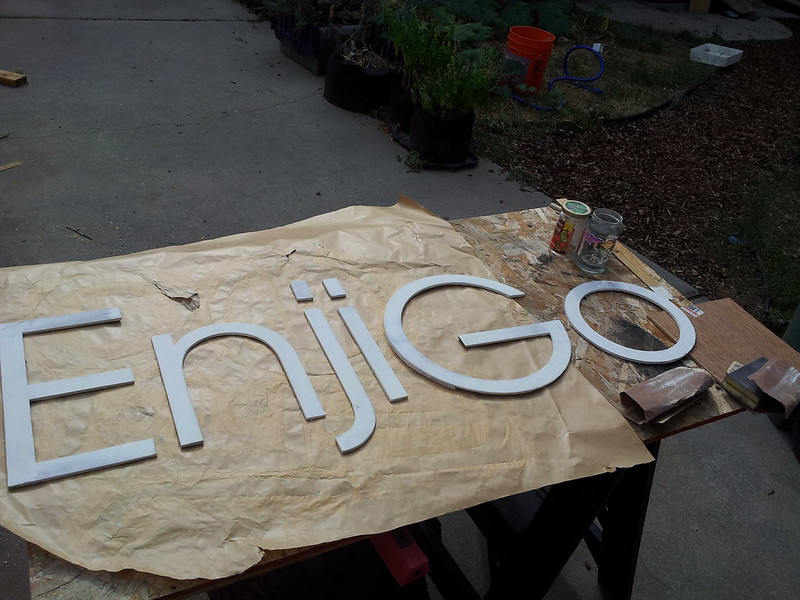
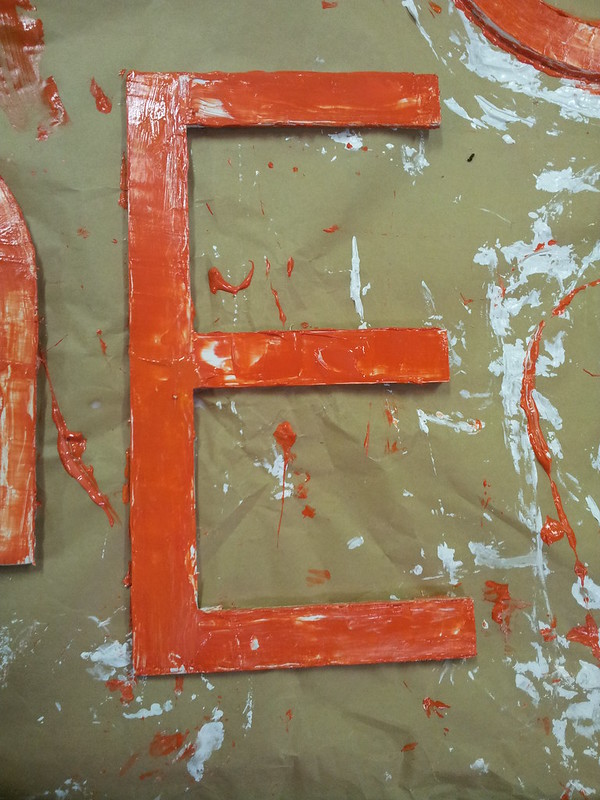
 I used the my laser cutter to make the sign from some spare luan plywood I had floating around, learned a painful lesson regarding how tough that shit is (way tougher than birch of a similar thickness and higher quality).  Here's a sequence of images show construction and final result:

(so pretty with just gesso on it...)

(I was going for a sort of plasticy look)

(this was the first time I had experiment with clear acrylic gel medium)

(the result of my efforts, regarding the sign)

Now, an important thing to note is that EnjiGo's space is about 5000 square feet and the rent is not insubstantial and as I previously noted the growth of the organization is happening slowly.  We need more members and we need to communicate what a great organization we are (trying to be), to this end I've started designing printed marketing material.  Here's a poster that should be arriving soon from the printer:

The plan is to slap these up around campus at the U, SLCCC, Westminster College and other locations.  Also, have business cards ready to go:


So, as soon as we get this material printed it'll be time to pound some pavement and distribute propaganda.

More later about other stuff...


Saturday, August 10, 2013

Less smoke, no fire...

Having burned up a bunch of balsa yesterday I decided to actually make something today.  This is a prototype of an Me109 balsa flyer I've been working on.  I've been playing with making balsa plywood (see the non-engraved horizontal stabilizer), harder to cut but much stronger.

(laser cutter in action)

(the fuselage is going to be 3 layers of 3/32" balsa)

Alas I've run out of 3/32" balsa, I'll need to take a trip to the hobby shop to get more.

Friday, August 9, 2013

Balsa wood and concentrated light

Toyed with the laser and balsa wood today.  I think the pictures speak for themselves, the higher power settings blow right through wood, the balsa also has a tendency to catch fire which is exacerbated by the high flow rate exhaust fan.  I finally got the settings figured out for a variety of thicknesses (cutting with little or no burning).


(I had finally gotten the engraving settings right and figured full power for a quick cut and it'll be done. Alas, this was a flawed assumption)

(Surely, power 80 out of 100 would be the right setting for this engraving job, NOT!)

(The best of the lot, the cockpit was too finely detailed and burned)

(Another almost there piece)

Wednesday, August 7, 2013

Laser up and running...

So, at long last, my dream of in-home rapid prototyping is realized.  After much work on the laser shed, electrical, ventilation and data have been run.  Defective water cooling pump replaced with superior pump of greater reliability.  Here are some pix of the laser and an engraving job that I ran on it to get a feel for its capabilities.

(yes, a box with a laser tube in it)

(behold it will cut circles...)

(the obligatory Dark Sol logo) 

Sunday, July 28, 2013

A new home for stuff...

UPDATE: Done with sheathing (almost, need to cut two little panels still) the shed.  The shed is now good enough to put stuff in...


I'm now in possession of a laser cutter... YAY!!!  Now comes the annoying part, laser cutters need more than just a power cable, they need air compressors, exhaust fans (attached to exhaust ports) and water pumps for laser tube cooling.  To put it another way a laser cutter needs a home, a home where you can cut holes in the wall and blow all the noxious smoke and cutting particulates out.  Currently this home doesn't exist (and the laser cutter is still in its shipping box), BUT worry not sports fans I'm working away at making a new shed into which I can put all the stuff in our current shed.  Here's a pic of the new shed's framing (this toddler was wandering around the backyard, no idea who she is):

So soon the current shed will be upgraded with insulation, electricity and ventilation.  Then the laser cutter will have a home, won't that be nice?

Thursday, July 11, 2013

Balsa wood flyer, anyone?

UPDATE: Been reworking these designs, here's a new rendering.


So, I've been dreaming up uses for the laser cutter I'll soon have unlimited access to.  I remember as a kid spending hours playing with a simple balsa wood glider.  Here's a balsa wood flyer for adults... it would be an electric RC plane in the "park flyer" class.  The fuselage, wings and tail would be reinforced with carbon fiber paneling, sandwiched between laser cut balsa wood.


Friday, June 21, 2013

Aerial installation...

Had an idea for an art installation (ideally in the UMFA's big empty mezzanine, that seems to sit empty much of the time), being filled with a variety of flying and floating drones.  Talked to +Jon D about his WiSEL quad-copter project to see if he'd be interested in working on such a project.  He liked the idea, so I've started dreaming up fairings for his tiny quad-copter design.  This could be a fun project.


(This is a sleek, form fitting fairing)

(This design takes into account the copters angle of attack)

(It seeks to minimize drag by applying streamlining orthogonal to the props' axis of rotation) 

Tuesday, June 18, 2013

Block lifter V0.3

At long last I've finally started getting parts glued up.  This version includes a slot interruptor to prevent the damn thing from damaging itself.  Still ended up doing lots of grinding and cutting on this revision.

(glued parts, bread boarded circuits and a hacked servo)

(block V0.3 getting glued up)

Sunday, June 2, 2013

Drones and the Pacific North-West

During a brief hiatus in parental duties (due to +Jason Hoff 's non-functioning ankle and the christening of an unsuspecting infant) I took the opportunity to visit +David Tolmie and +Timothy Carstens in Seattle.  As yet, a  decision I have no regrets making.  While here, I've gotten a chance to talk DIY UAVs with +Timothy Carstens and partake in many fermented and or distilled beverages.  Also, went to the Seattle Art Museum (downtown) a really nice museum that has just enough on display that I didn't burn myself out but large enough to keep me occupied for a couple of hours.  Here are a few shots of my favorite pieces:


(a clever concept piece)


(a perverse piece titled "water babies")


(an awesome use of 4x4s)

I've redesigned the drone's wing shape upon the advice of some of my pilot friends  Due to it's putative use cases I've opted for a much lower stall speed with good lifting capacity.  Here's a new planview:


Friday, May 17, 2013

Block lifting in action... slowly...

So here we go folks, actual evidence that stuff I design sometimes sort of works.  Im using a SM-S3317S full rotation servo to drive the set up.  I have yet to puzzle out how it "works" with the Arduino servo library, that is to say I can figure out how to get it going, but not how to stop the damn thing.  I'm sure a little more research will reveal the answer.  At the end of the day that's not the servo solution I'll be using, so doesn't matter too much.  As +Jason Hoff pointed out I need to use a power screw with a more course thread to increase the blocks speed, thankfully I already have some different screws for this use.  Anyway here's the video:

Thursday, May 16, 2013

Closing in on v0.2 assembly


First let me say that upon assembling block lifter v0.2 I have found numerous flaws in design (I'm sure I've said this before).  My solution for most of these flaws was drill bigger holes and use more glue, this strategy seems to have lead to misalignment and imprecision.  Regardless I think this prototype will basically do what it needs to.  Going to redesign the carriage component so it's easier to assemble and align.


Tuesday, May 14, 2013

Great Ape Adhesive, et cetera...

Yay, finally a post about progress as opposed to a post about how I dislike national hardware store chains.  In addition to prototyping designs I've also been experimenting with a variety of adhesives, all of block lifter v0.1 was glued up with one version of epoxy or another.  As I'm putting together v0.2 I've used epoxy for some of the heavy wear and tear parts, I'm also seeing how Gorilla Glue works (since I've never used the stuff).  Biggest surprise with Monkey Paste is how much it expands as it sets and cures.  Sure stuff I've read a variety of accounts (including the instructions) saying that it expands (3-4 times), but actually seeing the stuff bubble it's way out of joints is weird.  Here are some pix:

(The assembly for the block lifter)

(Almost everything about this carriage part is rough)

The above pictured carriage brace is probably the most jacked up part of the prototype, it's going to need to be completely redesigned.  The tolerances were too tight and the sockets for power screw's nut was too small by a few millimeters.  This is, of course, what prototypes are for, screwing things up and fixing them with jury rigging parts and lots of glue.

(drive train gears being glued together)


Thursday, May 9, 2013

Third time's a charm...


FTW


Woo hoo... 1/8" wooden dowels and friendly convenient customer service.  West Valley Hobbies comes to the rescue again.  Some day I'll get around to shooting pictures of block lifter V0.2, but not today.  Been too busy doing work work.

Tuesday, May 7, 2013

Everything under the sun...


except what you need.  Ace certainly isn't the place and Home Despot has failed to stock much of the stuff I was looking for today.  No 1/8" wood dowels, no 1 3/4" 4-40 screws with countersunk heads so I guess it's off to the specialty stores with me.