
Friday, May 17, 2013
Block lifting in action... slowly...
So here we go folks, actual evidence that stuff I design sometimes sort of works. Im using a SM-S3317S full rotation servo to drive the set up. I have yet to puzzle out how it "works" with the Arduino servo library, that is to say I can figure out how to get it going, but not how to stop the damn thing. I'm sure a little more research will reveal the answer. At the end of the day that's not the servo solution I'll be using, so doesn't matter too much. As +Jason Hoff pointed out I need to use a power screw with a more course thread to increase the blocks speed, thankfully I already have some different screws for this use. Anyway here's the video:
Thursday, May 16, 2013
Closing in on v0.2 assembly

First let me say that upon assembling block lifter v0.2 I have found numerous flaws in design (I'm sure I've said this before). My solution for most of these flaws was drill bigger holes and use more glue, this strategy seems to have lead to misalignment and imprecision. Regardless I think this prototype will basically do what it needs to. Going to redesign the carriage component so it's easier to assemble and align.


Tuesday, May 14, 2013
Great Ape Adhesive, et cetera...
Yay, finally a post about progress as opposed to a post about how I dislike national hardware store chains. In addition to prototyping designs I've also been experimenting with a variety of adhesives, all of block lifter v0.1 was glued up with one version of epoxy or another. As I'm putting together v0.2 I've used epoxy for some of the heavy wear and tear parts, I'm also seeing how Gorilla Glue works (since I've never used the stuff). Biggest surprise with Monkey Paste is how much it expands as it sets and cures. Sure stuff I've read a variety of accounts (including the instructions) saying that it expands (3-4 times), but actually seeing the stuff bubble it's way out of joints is weird. Here are some pix:


(The assembly for the block lifter)

(Almost everything about this carriage part is rough)
The above pictured carriage brace is probably the most jacked up part of the prototype, it's going to need to be completely redesigned. The tolerances were too tight and the sockets for power screw's nut was too small by a few millimeters. This is, of course, what prototypes are for, screwing things up and fixing them with jury rigging parts and lots of glue.

(drive train gears being glued together)
Thursday, May 9, 2013
Third time's a charm...
FTW
Tuesday, May 7, 2013
Everything under the sun...

Monday, May 6, 2013
Ace is NOT the place!!!

A quick rant tonight. Got the cutting done for block lifter V0.2, I only made a couple of mistakes, nothing a little grinding with the Dremel won't fix. In V0.2 I decided to use 1/8" (3mm) wooden dowels for alignment this time around, they should impart better alignment than the metal rods I was using (I've had better success with wood dowels in other projects). So, I'm running around doing errands and I decide to duck into Ace and pick up an 1/8" dowel or two. Because "Ace is the Place", right? The ads that I've seen on TV tell me that Ace is a no hassel place to pick up things you need for any project you're doing. They have friendly helpful staff who will help me find what I need, that's what the ad says... Well, wrong on both counts, no help, no dowels to be found. Now I have to wait till I can make it over to Home Despot before I can start gluing things up. To hell with you Ace!!!

(The place that also doesn't have stuff)
Sunday, May 5, 2013
Obsolete but not neglected...
With a bit of spare time I decided to get block lifter V0.1 a bit more assembled. I'd still like to see how well or poorly this design works. As noted, my drill holes are not super precise (and the alignment of a number of key parts was a bit skewed while they were being epoxied together), so my trusty hand reamer got some good use today. Here are some shots of the assembled rack carriage as well as shot of the carriage held in the block (held together with a rubber band).


The vertical slide poles will be cut down to size (that is to say, there is a top to the block).

A view of the rack carriage as it will be when assembly is completed.
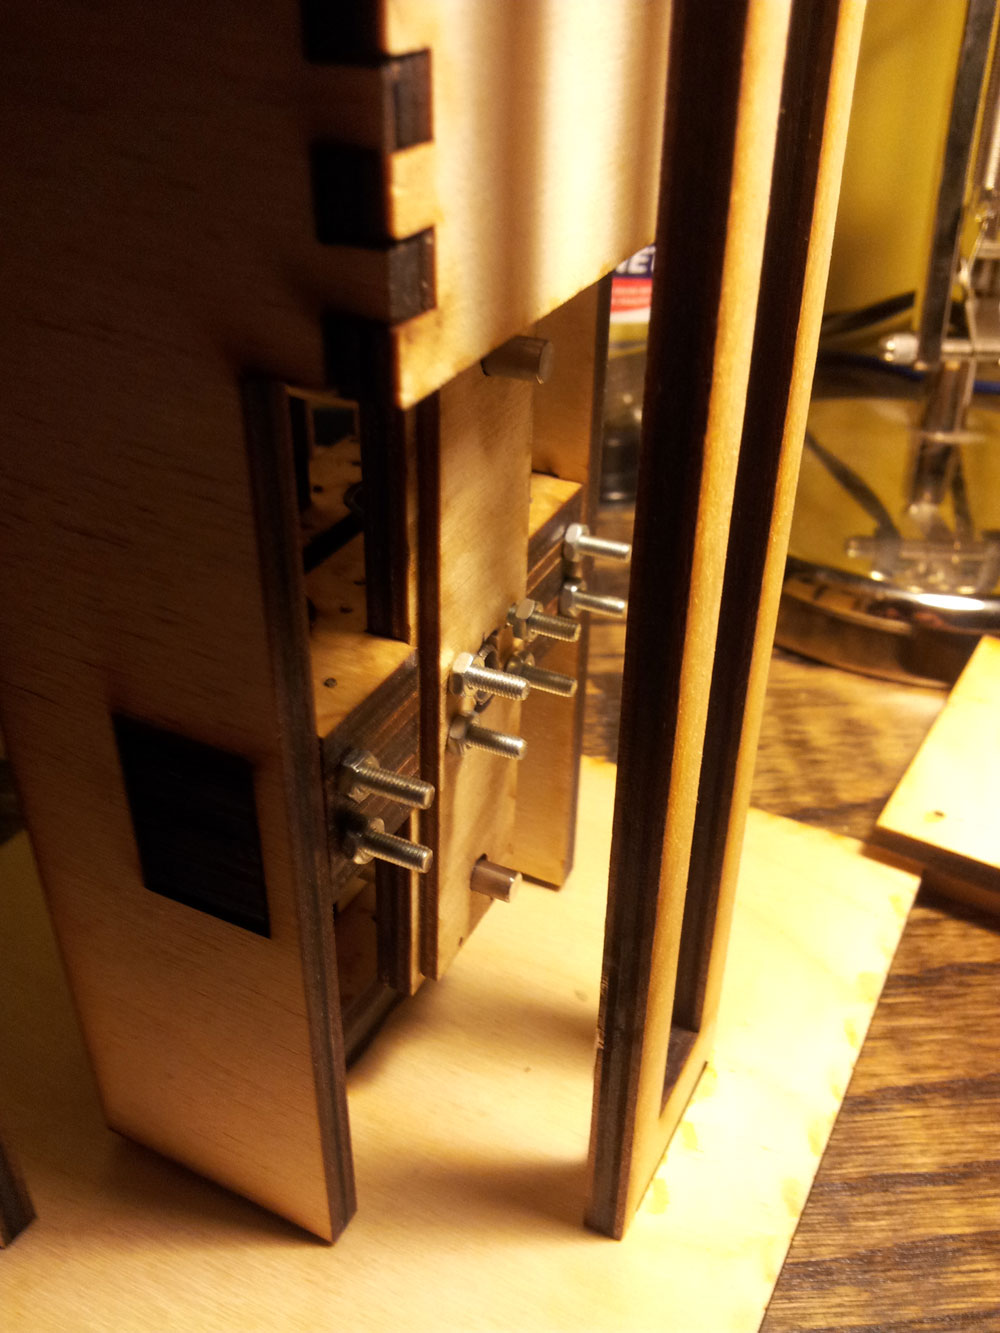
These screws are way too long, plus they're pan heads and to light in color. If I can find them I'd like to get some black anodized countersunk screws.


Behold the ugly as sin panhead screws. Just plain fugly.

The rack in all of its glory.
Saturday, May 4, 2013


Friday, May 3, 2013
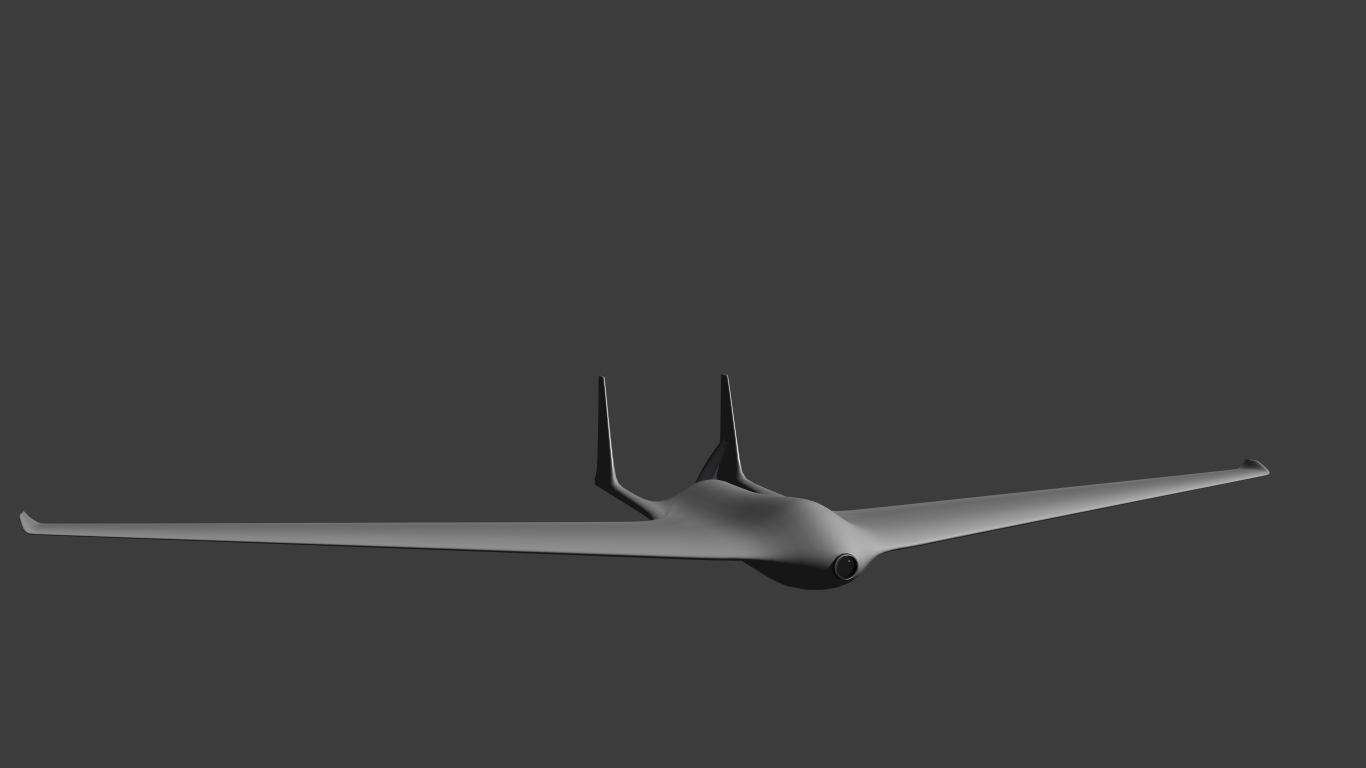
More drone stuff

After reading on the web and in the model airplane design book I've come to the conclusion that using a ducted fan (which the last concept model reflected) would defeat the purpose of my design. Ducted fans are noisy and inefficient (sadly)which makes sense though, smaller bades that need to spin faster (thus approaching the sound barrier and making more noise). Anyway this redesign drops the scoop on top, adds a camera lens detail and a prop.
Thursday, May 2, 2013
The constant drone...

of madness, gnawing away at my psyche. Actually not, just looking for a semi-clever way to work the word "drone" into my post's title. Anyway, read random sections of the model aircraft design book and learned that some of my design ideas for a drone are on the right track. I felt like modeling this evening so I threw this design concept together (even bothering to use the recommended airfoil shape for a swept flying wing design).

Wednesday, May 1, 2013
Droning on...
For the past couple of months I've been obsessed by my active labyrinth project (hence this blog). At about the same time I got this bug to build my own UAV (drone), and apparently I'm not the only one, as evidenced by this site. All I've got to say is, +Timothy Carstens this is all your fault. Anyway I've suckered myself into buying a book on model aircraft design. At a first glance this book covers everything I need, so if you want a book that seriously dumbs down (to simple-ish algebraic formulas and backed up by some straight forward calculus) the complicated field of fluid mechanics as it applies to fixed wing aircraft have a gander.

Once I've had a chance to digest some of the information perhaps I'll throw together a 3D model or two of what I'm thinking.
Subscribe to:
Posts (Atom)